
If you’re new to editing photos with Adobe Lightroom, the number of options and features in the Develop Module can seem overwhelming at first.
Keep in mind that you don’t have to learn it all at once. Processing photos is a skill that you will hone with practice and time.
The best place to start in Lightroom is with the Basic Panel. It looks like this:

Let’s break this panel down into three parts. If you master these three areas, you’ll have the skills needed to transform a shot like this:

Here are the three most important things I focus on when editing a shot, working from top to bottom in the Basic Panel:
1. Profile and White Balance
A small change with these controls can have a big impact on your image. I always start by picking a profile such as Landscape, Portrait, or Vivid, depending on the photo. This will give you a starting point to work from.
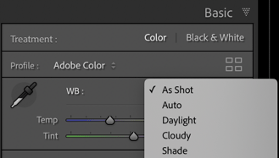
Next, I work with white balance, selecting the best option from the dropdown menu or manually adjusting the temperature slider. This will determine how cool or warm your image looks by adding blue or yellow. Here’s an example:
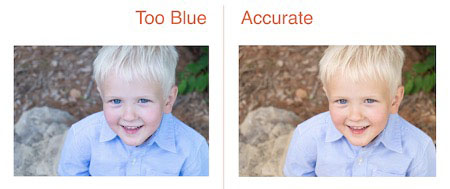
In the shot on the left, my camera recorded the blue color of the shady lighting conditions. By warming up the shot in Lightroom, using the white balance adjustment, I was able to create more realistic skin tones and a more pleasing portrait.
2. Tone
Here is where you can control the overall brightness levels and contrast within your photo.
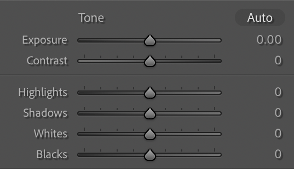
These sliders are very powerful and will give your photo a certain “pop”. Most images will benefit from a bit of increased contrast—but remember, a little goes a long way!
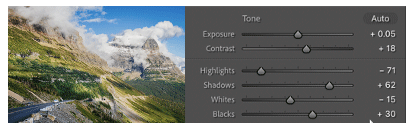
You can also use these sliders to lighten or darken the highlights and shadows, bringing detail to particular parts of your scene.
For example, you can move the shadow slider to the right if you want to lighten up dark areas. Likewise, you can move the highlight slider to the left if you want to bring out detail in brighter areas of the photo such as puffy clouds on a sunny day. That is what I did with the image below:
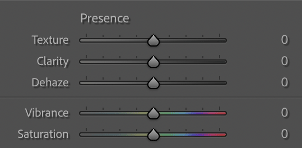
3. Presence
This set of sliders is where you can start to refine the details, adding more pop. For example, you can bring definition to your image with the texture and dehaze sliders. You can also use the vibrance slider to boost the colors. (I prefer Vibrance over Saturation because it gives a more subtle, natural effect.)
You don’t have to use all these sliders for every image. Think of them as options in your toolbox. Ultimately, the specific photo and your creative vision will determine which options to use.
If you master these three parts of the Basic Panel, you’ll be able to improve any image while building a strong foundation to further your Lightroom knowledge.
Remember, the sliders in the Basic Panel are meant to be used together to polish an image. The trick with editing is to learn not to go too far. You don’t want your photo to look overedited.
The great thing about Lightroom is that you can never mess up your photo. If you don’t like what you’ve done, you can always just reset the image to its original state and start again.
This makes Lightroom ideal for learning and playing. Give it a try and have fun transforming your photos!