Like many other photographers, I use Adobe Lightroom Classic for my image processing. It’s a powerful editing tool that can produce striking photos with only the tweak of a few sliders. By using Lightroom I can transform a dull, boring shot into a vibrant, impactful photograph.
Just spending a few minutes in Lightroom straightening horizons, removing sensor spots, and making minor adjustments to the exposure, clarity, tone curve, and white balance can vastly improve any photo. It can mean the difference between a saleable and unsaleable image, and even whether you’re happy sharing your shot with friends.
Lightroom makes it easy to avoid repetitive work. Instead of repeating the same actions image by image, you can make time-saving presets and apply them over multiple images—and one preset can have as many different settings as you want. For example, I have a preset that automatically applies the lens profile to all images in a shoot.
After processing an image, it’s eye-opening to compare the original imported RAW (or even JPEG) file with the final photo. To illustrate this, below are examples of the before and after of images I processed.
I didn’t make many adjustments to this image of a Buddhist temple in Thailand—just a few tweaks made a big improvement:

In the Basic panel I reduced the sliders for the highlights and the blacks and increased them for the shadows and clarity. I also slightly adjusted the lights and darks in the tone curve as well as the Blue Primary saturation in the Calibration panel. Lastly, I removed sensor spots in the sky. That’s it. It only took me a couple of minutes.
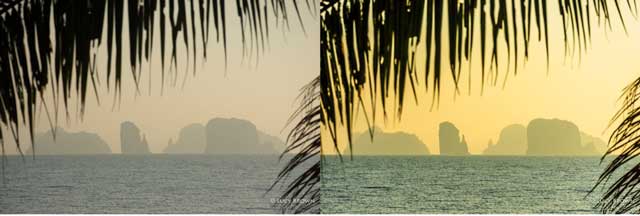
Below is a seascape of the limestone karsts in Phang Nga Bay in Thailand. As well as making similar adjustments to above, I also straightened the slightly skewed horizon and reduced the yellow and aqua luminance in the HSL panel. Also, to further boost the golden sunrise glow, I again increased the Blue Primary saturation in the Calibration panel. Here are the before and after images:
I made similar adjustments to the exposure, clarity, and tone curve on this image of two volcanoes at Lake Atitlan in Guatemala:
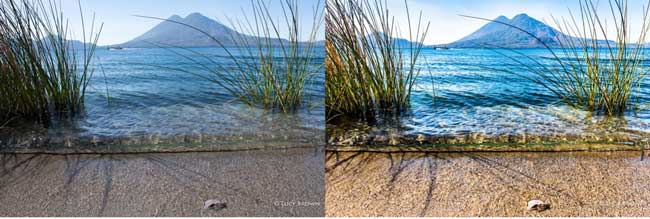
I again straightened the horizon and slightly increased the Blue Primary saturation in the Calibration panel. I added a graduated filter to the top of the image to reduce the highlights and exposure in the sky and to emphasize the volcanoes. Lastly, I warmed up the white balance.
Finally, if you’re still not convinced of the benefits of processing in Lightroom, then look at this sunset image of Thai longtail boats at low tide:

Shooting toward the setting sun left the beach and boats in deep shadow. By adding a graduated filter to the underexposed foreground, I opened the shadows in that area without affecting the bright sky.
The imported image is only the beginning of the creative process. You only need to look at the before and after images to fully appreciate the benefits and power of processing in Lightroom. In my mind, Lightroom is equivalent to the artist’s brush and palette, providing photographers with the tools to create their own unique vision. Just experiment and see for yourself how you can transform your own images into striking works of photographic art.