We’re going to wrap up our “Back-to-Basics” series with three techniques you can use to improve your photos and get some unique shots.
If you’re just tuning in, for the past few weeks we’ve been looking at simple ways you can create stronger and more salable images.
So far we’ve covered: rule of thirds, intentional horizons, and cutting the clutter. Be sure to catch up on any issues that you’ve missed!
I hope that taking a step back and looking at the basics has been helpful. No matter how long you’ve been photographing, it never hurts to brush up on these techniques and perhaps get some new ideas.
The more you practice and push yourself as a photographer, the more improvement you’ll see in your photos — and income.
So get out there and put these ideas into play!
Back to Basics Issue #4: Creating Depth
By Sarah Ehlen in Missoula, Montana
Have you ever taken a photo that you feel just doesn’t do a place justice? It’s easy to shrug and say, “Well, I guess you just had to be there”… But maybe there’s more to it.
One reason we sometimes struggle to capture what we see in real life in a photograph is because we’re trying to take a three-dimensional world and cram it into a two-dimensional space.
It’s a problem of depth. If a photo feels flat, it won’t really “wow” the viewer.
The question is how to create a sense of depth in our photos so that the viewer feels like they are there in that scene.
Here are three ways to bring depth to your images:
1. Find interesting foregrounds.
Including something in the front of your photo will really help create a sense of space and perspective.
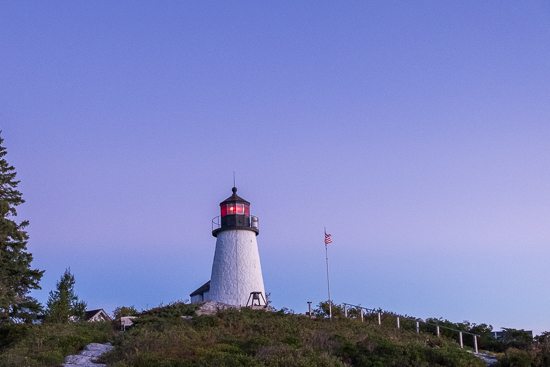
The photo below doesn’t have much of a foreground in front of the subject, and it feels a little flat, or two dimensional.
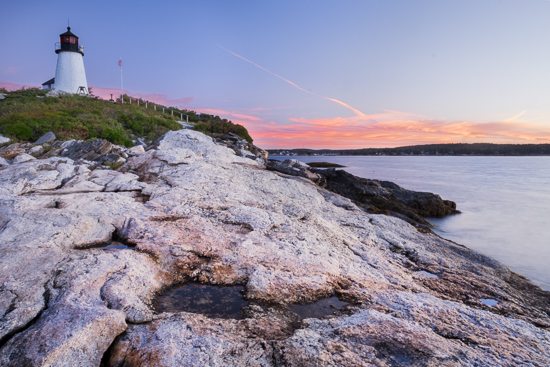
However, I was standing on some beautiful rocks as I took the shot above. By angling my camera down and including these, I’ve now created a photo that feels much more three dimensional.
It has both a strong foreground and background for the viewer to explore.
2. Experiment with framing.
Another way to add depth to an image is to use something to ”frame” your subject. There are a lot of ways to do this. Here’s one example:
As I was riding on a ferry leaving Seattle I was struck by the silhouette of the city skyline, so I snapped this shot:
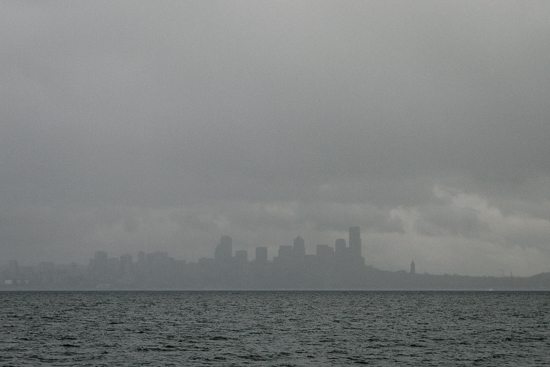
Here again is a photo that feels very flat and boring. The image needed something so I decided to frame the city using part of the ferry boat in the photo below.
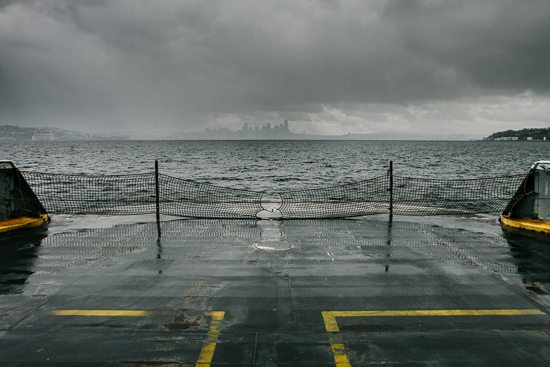
By placing the city between the two posts, I created a natural framing effect that gives the viewer a sense of depth perspective. I included the yellow lines as a strong foreground element to add interest and lead the viewer into the scene.
Here’s a couple more examples of framing:

Keep an eye out and you’ll find endless opportunities to frame your subject. Doorways, bridges, tree branches, windows, and tunnels all work really well.
3. Look for layers.
I’m always on the lookout for things that I can possibly shoot through to create a layered effect. All you have to do is find something that you can get really close to so that it will become a soft blur in your photo. Foliage, fabric, and window glass all work great.
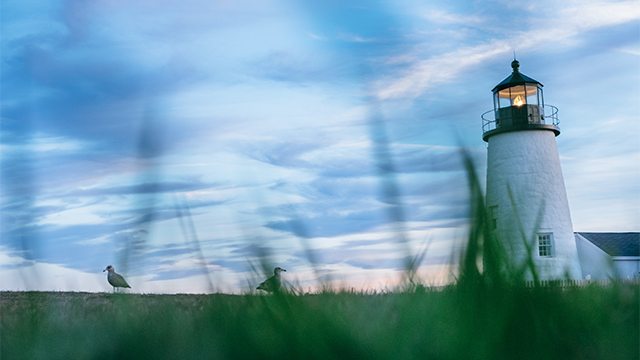
Here’s a photo I took during a recent visit to Maine:
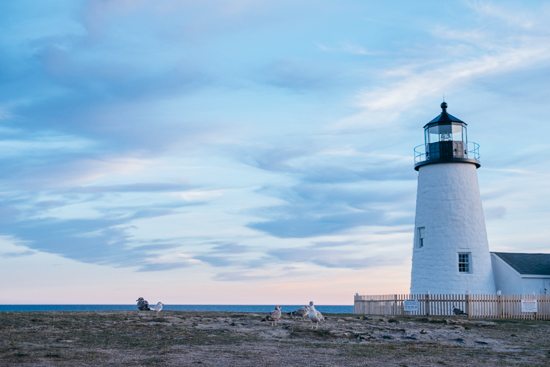
It’s ok, but it pretty much looks like a typical lighthouse shot. I wanted to create something a little different that might stand out in a stock photo gallery, so I tried using the grass to create layers in this next shot.

Do you see how shooting through the blades of grass creates a photo with more depth and visual interest since the viewer’s eye can now travel through the grass and into the scene?
These are just a few examples to get you started.
Approach your next photo shoot with this idea of creating depth. Since a photograph is actually two-dimensional, we have to use these types of techniques to “trick” the viewer into seeing differently.
This is a fun challenge that will really help your photos stand out, so give it a try!