Last week, we talked about the importance of adding keywords to your stock photos… and how to come up with the best keywords to use. If you missed it, you can read it here.
Keywording can be boring and tedious… especially if you’re submitting your photos to multiple stock sites and adding the same keywords every time.
Here’s a huge time-saver: Add keywords to your photos in Lightroom. They’ll stay with the photos when you upload them to multiple sites… so you only have to do it once!
STEP 1: In the Lightroom Library Module, select the photo or photos you want to apply keywords to. Then, on the right hand side of the screen, find the “Keywording” panel.
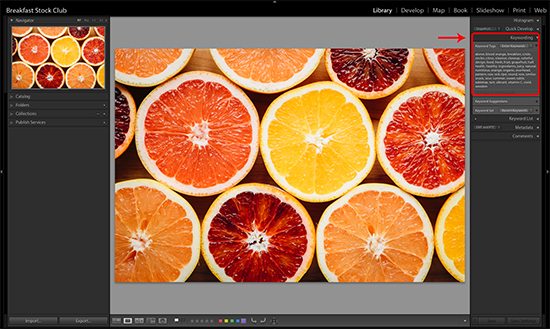
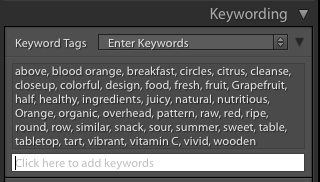
When you click on the dropdown arrow to expand the panel, you should see a box to enter keywords (see enlargement below).
STEP 2: Simply type the keywords you want into the area that says “Click here to add keywords.” You can include as many as you’d like, separating each one with a comma. Hit the enter key on your keyboard when you’re finished typing.
That’s it, you’re all done! You’ve now written the keywords behind the scenes, into the metadata of your file.
Note: Lightroom automatically arranges your keywords into alphabetical order. Some stock sites ask that you put your keywords in order of importance, so you’ll need to rearrange them if that’s the case with the agency where you’re submitting.
As you can see, Lightroom makes it incredibly easy to add keywords. And the best part is that these will automatically come along with your photo when you upload to your stock sites.
No more manually typing every keyword in at each stock site over and over. This means you’ll have more time for the fun stuff — like taking photos!