
 These days, we pretty much all have a great camera in our pockets. Whether it’s an iPhone, Android, Galaxy or other cell phone, they all come with better cameras than the original full-size digital camera I bought nearly 15 years ago.
But, just because the cameras are good doesn’t mean you’ll end up with good results. The person behind the camera (regardless of what type of camera that is) is the true creator.
So here are a few tips and tricks to help you take great smart phone photos when you’re on the go.
1. Use Composition Techniques.
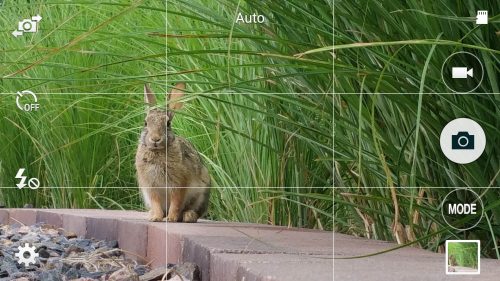
Did you know that with the iPhone you can turn the “rule of thirds” grid on?
The “rule of thirds” grid divides your photo into a tic-tac-toe board and helps you keep your subject out of the center of your image. It’s helpful for those who are training their photographic “eye” to avoid the bulls-eye shots most snap-and-goers take.
To turn on this grid on an iPhone, simply go to Settings, select Photos & Camera, and enable the grid function.
Other composition elements work, too. To show depth in your photo, for example, think in terms of foreground, mid-ground, and background. Place something in your foreground—like a flower, fence, tall grass—put your subject in the mid-ground range, and pay close attention to what’s in the background.
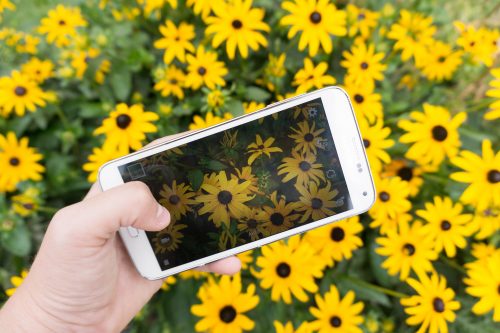
2. Use the Main Camera: The “selfie” camera is great for selfies and fun shots with friends, but to get much higher quality photos, make sure to use the main camera. The same basic rules apply as to a regular camera—check the camera settings and make sure to set the resolution and picture quality to the highest possible.
3. Think About Your Light: Lighting is important in any photography but when you’re using a smart phone it’s even more important to keep your lighting in mind. This is simply because the lower the light you take your photo in, the worse the quality gets.
To get your light right, follow these tips:
Try to keep the light at your back and your subject well lit.
Avoid the on-camera flash. The light it provides is harsh and horrible—not great for getting high-quality shots. There are occasions when it comes in handy, but as a rule try to leave it off.
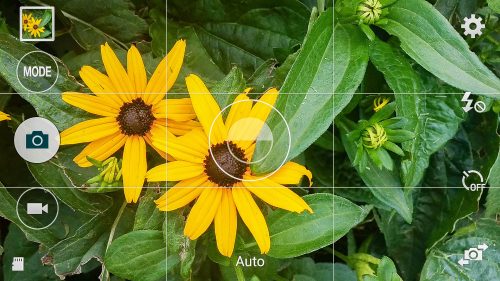
4. Set the Subject: Once your composition (how you arrange your shot) is set and you are ready to shoot, tap the screen on your main subject. This will set the focus as well as the exposure for your subject. Hold still, brace your arms to steady, and take the shot.
5. Avoid the Zoom: Just like other cameras that have “digital zoom,” you almost never want to use the zoom function on your smart phone. It won’t give you a better photo; what it does is simply crop into the picture, giving you a much lower quality.
Instead, try to get closer to what you’re photographing, if you can. If you must crop the photo, it’s better not to zoom and to crop your photo in post processing. (Note, even the simplest of processing apps has a crop tool.)
6. Use the “Burst Mode”: If you have action coming fast and furious and you want to take multiple shots as the action happens, hold the shutter button down. Your camera will start taking multiple images in rapid succession.
Do be careful though. By using burst mode, you will get a ton of shots that will take up space on your device. I recommend taking a moment, when you can, to look through the burst of shots on your camera roll after you take them.
To view all the shots taken, tap select. Now look through all the shots. First tap the ones you like and then tap done. Then you can choose to delete the unselected ones then.
7. Capture Details: While you can get some nice fairly close-up shots with the camera itself, if you want to get super close-up details, you can accessorize your phone with external lenses.
A super-wide-angle macro lens can give some stunning results. There are a number of options for these external lenses ranging in price. (Be aware they are quite small and therefore easy to lose, so pack them away somewhere safe when you’re done.) Olloclip or Moment are two top brands to consider. (They also have tiny tele-lenses.)

8. Take Panos: Set your camera to pano (the far right option on your phone when you’re in the camera). This is easy to use: Try to stay in the same level plane and slowly rotate in the direction of the arrow on screen. (You can switch the direction in the settings.) Pano does a pretty amazing job of seamlessly stitching your whole shot together.

You can have a lot of fun with this one too: Have someone run around and get in multiple spots as you slowly build the shot for a quirky and interesting photo.
9. Keep it Clean and Simple: It’s more important with phone photography than with a regular camera that you’re vigilant about what’s in your shot and what’s out of it. The cleaner and more simplistic, the better your photo will turn out.
10. Process: Once you’ve captured your masterpieces, processing takes it the final step to greatness. There are a few apps I use for processing on my phone. VSCO or Filmborn are my two favorites and give solid results.
There you have it—10 of my best smart phone photography tips to help you get the most from your phone camera. Happy shooting!