Ever wondered how to take your photography to the next level? Perhaps you bought a high-end DSLR or mirrorless camera, took a few photos, and asked yourself, “why don’t my photos come out the way I want them to?” Sometimes people tend to think that buying an expensive camera automatically guarantees amazing photos. Don’t get me wrong, having a good camera, or lens, definitely helps in that department, but it by no means is the be-all-and-end-all.
Think of it like this, your camera is a car. A car does not drive itself, well, at least yet! You can have the best car in the world but if you don’t know the basics on how to drive it, that car is of no use to you. While most cars offer either an automatic or manual transmission, some newer cars provide you with both options. When driving in auto mode, or an automatic car, the car makes all of the decisions for you. When driving in manual mode, or a manual car, it’s up to the driver to make the decisions for the car. This is very similar to shooting in auto mode on your camera vs manual mode. When shooting in manual mode you have total control over the camera and how your photos will turn out.
For the record, there’s nothing wrong with using automatic modes, or various priority modes, but learning the basics of your camera, including how to shoot in manual mode, will allow you to push your creativity and take your photography to the next level
While today’s topic is all about shutter speed, I’d like to give a quick overview of the “exposure triangle.” The exposure triangle consists of ISO, aperture, and shutter speed. Together they control the amount of light that can enter the camera’s sensor while also providing additional creative options. Having said that, it’s a give-and-take relationship. If I were to change the aperture, I would then have to adjust the shutter speed and/or ISO to counter that. By mastering these three settings, you will gain full creative control of your photos while maintaining the perfect exposure. (Exposure essentially is the overall brightness or darkness of an image. The perfect exposure would mean that your image is not too dark or too bright.) I’m sure that this may sound slightly complex or confusing but in practice, it’s actually extremely easy, so don’t let the above deter you!
With the basic overview behind us, we can now jump deeper into the wonderful world of shutter speeds!
What is Shutter Speed?
A shutter is a plastic or metal piece within your camera that opens and closes. When the shutter is open, light is able to reach the camera’s sensor. Shutter speed is literally just that. The speed or length of time in which your sensor is open and letting light in. The longer the shutter is open, the longer it takes to take a picture. Leaving your shutter open allows you to capture motion blur or even make the ocean look smooth. The faster your shutter is, the quicker you can take an image. With fast shutter speeds, you can freeze movement, such as a bird flying overhead, or freeze the action of a sports game. More on this below!
What are the benefits?
So what’s the deal? Why should you manually control the shutter speed? What are the benefits and why not just let the camera decide for you?
The main benefit for taking control of the shutter speed vs letting the camera decide is for artistic and creative purposes. When you are in auto mode on a camera, your camera does not care about being artistic. It only cares about one thing, getting the correct exposure! This makes total sense. Who wants an image that’s too dark or too bright? By controlling the shutter yourself and using manual mode, you can get the best of both worlds. Proper exposure and creative control!
Creative / Artistic Control:
Long Exposure:
You may have heard of this term and wondered how to do it. As a landscape photographer, I tend to use long exposures quite often, especially when shooting seascapes. As stated above, the longer that the shutter is open, the more light is let in. This will also determine how defined or smooth certain areas in your image will be. Particularly moving objects, such as people, water, and so forth.
Capturing Action:
Using faster shutter speeds allows us to freeze action without having motion blur. The faster an object moves, the faster your shutter speed will need to be. What do I mean by fast shutter speeds? This essentially means that the shutter is open for a very short period of time and therefore does not let in a lot of light. An example of this would be 1/500th of a second.
I’ll discuss this in more depth in the next section!
Exposure Control:
Letting in light / Reducing light:
By adjusting the shutter dial on our camera, not only do we gain creative control, but we can also control how bright or dark the image will be by determining how much light to let in.
Let’s have a more in-depth look at how to use shutter speeds with a few examples below!
How to use Shutter Speeds:
The basic principles:
In the introduction, I mentioned the exposure triangle (ISO, aperture, and shutter speed). All three of these settings control how little, or how much light can reach the camera’s sensor. This is definitely a balancing act. While in auto mode, the camera’s goal is to always aim for the “perfect exposure.” Unfortunately, artistic decisions are sacrificed.
In order to express yourself creatively in your images, you will need to prioritize a setting (mainly the aperture or shutter speed). Once you’ve done that, you’ll need to balance out the other two settings so that you can still maintain that “perfect exposure.”
Pro Tip: One thing to note is that your aim should always be to keep the ISO at 100 where possible. (There are exceptions, night photography being the major one!) This means that you really only need to focus on either the aperture or the shutter speed.
If my focus is on the aperture, for creative purposes, I will then only need to adjust my shutter speed. How I adjust the shutter speed will be determined by whether I need more light or not. What do I mean by needing more light? The goal here is to make sure that the image is not too dark, or too bright, hence a properly exposed image.
Let’s say that I want to create a long exposure. Right away I know that I need to place priority on my shutter speed. Thankfully the concept above remains the same here. I’d set my shutter speed first and then adjust my aperture to balance out the exposure of the image.
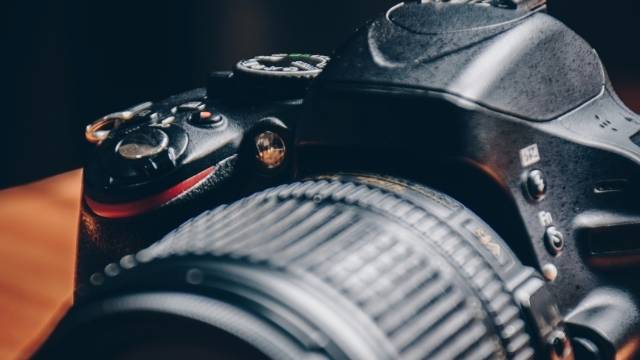
The dials:
Once we have a basic understanding of this process we can think about the actual dials on your camera. Every camera will have a dial for your aperture as well as your shutter speed. Firstly, you will need to set your camera to manual mode (more on modes below). Once you’re in manual mode you can adjust the aperture and shutter speed dial. Not only will you be able to see a change in the overall brightness or darkness by doing this, but you’ll also see the aperture and shutter speed information changing. Depending on your camera, this can be seen while looking either in your viewfinder, and/or on the back of your camera via live view. For shutter speed, you’ll see numbers displayed as, 1/1000, 1/500, 1/100 (faster shutter speeds) or ¼, 1 second, 30 seconds, etc. (longer shutter speeds).
I’d recommend just playing around with these settings and taking a few images. The best way to learn is by practicing!
Shutter Priority Mode:
While there’s also an aperture priority mode, we will focus solely on shutter priority mode. This setting is found on the same dial where you select auto mode and manual mode (Refer to your camera’s manual).
With shutter priority mode, all that you have to do is set the shutter speed to your desired setting and the camera will automatically control the aperture, as well as the ISO for you. Sounds great, right?
In some situations, this can be useful, however, there are also some drawbacks. I mentioned before that one should always aim to have the ISO set to 100 where possible. The higher the ISO the more noise will be introduced into your image. Noise basically looks “grainy” and not clear. This is why it’s best to keep your ISO set to 100. Now, remember how I pointed out that in auto-based modes the camera’s priority is about getting a good exposure? Well, in shutter priority mode, that same concept applies. While your selected shutter speed setting won’t change, it can and will change your ISO settings to compensate (it’s all about the light balance between your ISO, shutter, and aperture). Some cameras offer a few settings to counter this, such as setting an ISO range, or max ISO, so that it cannot go above this, but that’s not in the scope of this tutorial.
In addition to your ISO settings changing, you may not want your aperture to change drastically either. Why not you might ask? Let me quickly explain the importance of this setting. Your aperture essentially determines how much of your image will be in focus or “sharp.” If I’m shooting landscape photography, more often than not I would want the majority of the scene to be “sharp.” If shutter priority also adjusts my aperture settings, then I may not achieve my desired sharpness. This is why I only shoot in manual mode.
Now, this is not to say that aperture or shutter priority modes are not useful, because they do have a time and a place. In fact, it’s a great way to start learning about shutter speeds and apertures. In this way, you’ll be able to explore the artistic benefits that these settings offer without having to think too much about exposure. Once you feel comfortable using aperture and shutter priority modes, you can switch over to manual mode and take full control of your images.
Shutter Speed Guideline:
Longer Exposures: Creates Blur – Less Defined
| Use | Shutter Speed | Notes |
| Blurring water, such as a waterfall | ⅛ → 2 seconds | Depends on the waters speed and how much detail you want to retain |
| Blurring water, such as the sea or river | 2 seconds → 10 minutes + | Depends on the waters speed and how much detail you want to retain |
| Astrophotography | 20 seconds + | Starting range for night photography |
| Star Trails | 10 minutes + | The longer the better the results |
Fast Shutter Speeds – Freezing Action
| Use | Shutter Speed | Notes |
| Freezing people walking or slow-moving animals | 1/250th + | This will freeze motion without motion blur |
| Freeze Cars – Bikes in Action | 1/1000 + | This will freeze motion without motion blur |
| Sports | 1/1000 + | This will freeze motion without motion blur |
| Birds Flying | 1/2000 + | This will freeze motion without motion blur |
Keep in mind that these are just rough guidelines and that every situation is slightly different. It’s important to try out a few different settings until you get the effect and/or look that you’re after!
A few examples in practice:
Shutter Speed and Water
There are a few questions that you should ask yourself when shooting seascapes. Do you want to freeze the wave action, have a little motion blur while maintaining some detail, or would you prefer to have silky smooth/blurred water? Once you have a plan you can then use the above table to determine your shutter speed range.
Let’s say that you wanted to maintain some detail but also wanted to add a bit of motion blur to the waves. Starting off at about 1 second would be a good starting point. From here, you should check your photo and make additional shutter changes until you achieve your desired look/effect. You could also try 2 seconds, or 5 seconds, etc. It’s really up to you and that’s the beautiful thing about having control! Now, let’s say that you did not want to capture any wave detail, but rather preferred silky smooth water. You could set your shutter speed to 1 minute or even crank it up to 10minutes +. Again, this is entirely up to you and comes down to personal taste.
Pro Tip: When shooting long exposures you will need a sturdy tripod so that there’s no camera shake/movement.
Shutter Speed and Sports
You’re at a soccer (football) game with your camera in hand. You take a few images and wonder why the players look blurry. The answer is that you’re not using a fast enough shutter speed. A good starting point for sports would be about 1/1000th of a second. This will allow you to freeze the players in action without any motion blur. Of course, you may need to make adjustments.
By learning the basics of your camera you can really take your photography to the next level and unleash your full creative potential. Most importantly, have fun and try out different settings until you find something that you like!