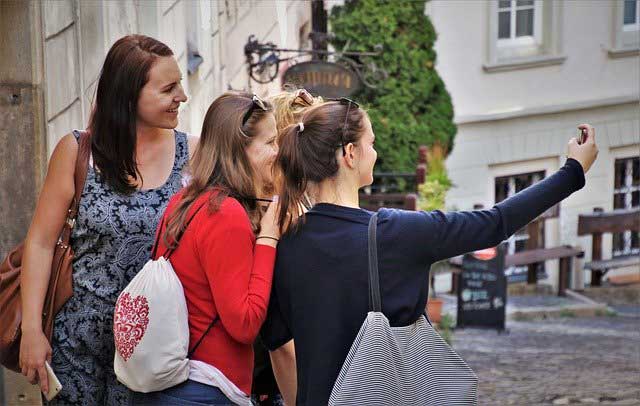
Are you photogenic?

Most people will say no. But really, ANYONE can be photogenic. Yes, even you.
The trick is to simply relax and be your natural self.
That face you make in photos — you know, the one you’ve practiced in front of the mirror? Forget that.
Instead, have a look at these common portrait no-nos, and how to avoid them… no matter which side of the camera you’re on.
The Poser


Most people have no idea what to do when the camera is pointing at them.
Whatever you do — don’t strike a pose. Instead, relax. Look into the lens of the camera as if you were looking into the eyes of the person who’s taking your photo.
The Dreaded Duckface


Born on Facebook and Myspace, the “Duckface” epidemic is sweeping the globe, making people everywhere look ridiculous.
Pursing your lips like a “movie star” does not make you — or anyone — look good. Again, just relax.
You’ll be much happier with the end result.
The Blinker


Some people have a talent for blinking in photos.
You know who you are. To solve the problem, close your eyes and ask your photographer to count to three.
On three, you open your eyes and they shoot.
If you’re the photographer, turn this situation around – tell your model to close their eyes and open on three. Works every time.
The Double Chin


When the camera is below eye level, shooting up at someone, you’re in the Double Chin Danger Zone.
Try to shoot on eye-level or slightly above. If you’re a short photographer, get a small stool you can carry around, like this, and shoot down from above:
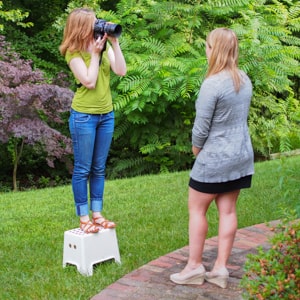
You can also stand up on a staircase, or put your photo subject in a chair. And if you’re the photo subject getting double chins, make sure you lift your chin up and stick it out just a little.
The “Say Cheese”


Smiling on cue is one of the fastest ways to make a photo look forced.
If you’re the photographer, try getting your subject to talk about something that makes her happy… then shoot when her smile is genuine.
And if you’re the subject, try thinking about something that makes you genuinely happy before you say “cheese.”
Bonus Tip: The Deer in the Headlights


Straight-on shots of someone trying to look natural often look… strange.
If you’re the subject, turn your body at a slight angle and turn your face back to the photographer to get a more dynamic, relaxed look. This is another instance where closing your eyes for a few seconds can help to “reset” your face, so you don’t look frozen like a statue.
Take a few warm-up “test shots” and get your subject to chat. When both the photographer and the subject feel comfortable, that’s when you’re going to get a better shot — and show your photo subject that yes, she really can be photogenic.
As a side-note, the above tips work great for self-portraits, too.
No one thinks they’re photogenic. But EVERYONE is photogenic in the right conditions.
And no, I don’t mean “in the dark!”
My favorite thing about taking portraits and headshots is hearing the words, “Wow, you made me look good!”
Whether you are getting your photo taken or setting out to take great people photos among your clients, here are three tips for making anyone photogenic…
How to Make Anyone Photogenic:
1. Give confidence.
People are at their most photogenic when they’re not forcing a smile. And the trick to looking natural is feeling relaxed and confident.
As a photographer, before you do anything, strike up a conversation with your photo subject. What do they like to do for fun? What are their kids up to? What’s one funny thing that happened this week?

You can also tell them to listen to their favorite “pump up” music in the car on the way to the shoot… or offer to let them play it on their phone during the shoot!
Another way to make someone confident is to get them doing what they love. This kid clearly loves boxing. Photographing people in their favorite environments certainly helps, too.

2. Find the right light.
Good light is like magic for portraits. Just look at this phone selfie I took with bad light and then better light…
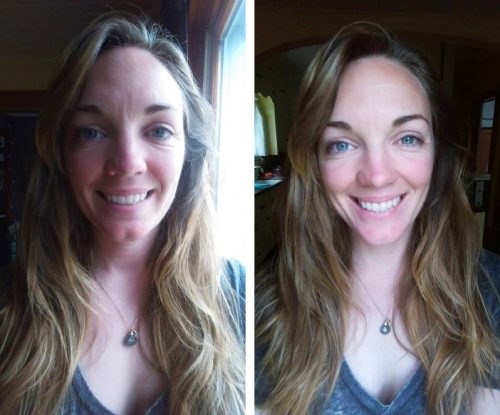
Good portrait light depends on what you’re looking for, but typically, it’s soft, indirect light that comes from right in front of your subject’s face. Put your subject in the shade or shoot on a cloudy day – or inside by a window on the shady side of the house – for great results.
And make sure it’s not coming from the side, too far above or below. Look at that “before” shot, above – the light coming from the side highlights any wrinkle or imperfection in my face.
3. Pick a good portrait lens.
Certain lenses can distort faces, making your subject’s nose look bigger or making their face look wider.
Take a look at these sample shots taken by the creator of our Turn Your Pictures into Cash program, professional photographer Rich Wagner.
The top-left photo was taken at 200mm, then he took one at 150mm, 100mm, 70mm, 50mm, 35mm, 28mm, 24mm, 20mm, all the way down to a very wide angle — 14mm!
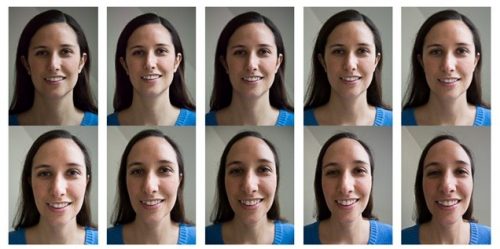
See how much her face changes from the first shot to the last?
Most photographers prefer to take portraits at around 50mm – 110mm. If you have a lens that will allow you to use a focal length in that range, you’ll be good to go!
It comes when you raise your hand and say: Yes, I’m going to do this. And then you follow that with action to learn your camera, study light, recognize good composition and post-process your images on your computer.

