When I first began photographing family portraits, I wondered how the professionals made their portraits “pop.” What did they do to give their pictures that professional polish? When my photos came out of the camera, they seemed a bit dull and lifeless.
Then I discovered that the pros’ photos didn’t look much different than mine straight out of the camera. The difference was, they were processing them either in Lightroom or Photoshop.
Lightroom was brand new back when I started using it, but it turned out to be the best learning tool out there. It’s way less complicated than Photoshop. And you can play with all the Lightroom tools to your heart’s content without permanently changing anything in your photos. If you don’t like something you’ve tried, just go back to where you started and try something else.
I’ve now been using Lightroom for years in all of my photography, but there are a few select tools I especially love for portraits. One of them is the Split Toning Tool, which you’ll find in the Develop Module.
It sounds a bit obscure, but once you see how it works, I know you’ll love it.
The problem I noticed with many of my outdoor portraits was that the colors seemed dull and lacking warmth. I discovered the Split Toning Tool could add a touch of warmth and richness to my photos without making everything turn yellow.
Here is one before-and-after example of how I’ve used it to add warmth to dull images:
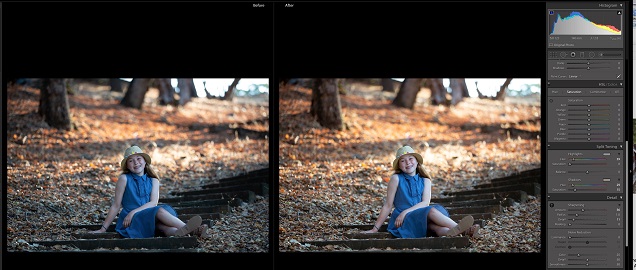
Using Split Toning, I’ve only adjusted the Shadows of the image, because I didn’t want to affect the lighter skin tone as much as the darker parts of the image. The toning added the warmth I needed to give this image that golden glow.
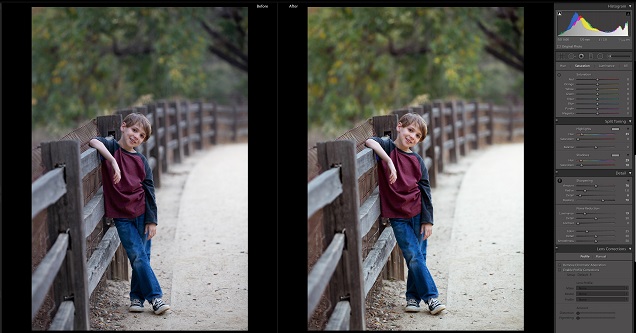
Here is another example, below. I shot this image in a shady area right before sunset, so it came out of the camera looking flat. With Split Toning, I was able to add a touch of warmth to the wood in the fence and the greenery in the trees—again, without turning everything yellow.
Here are the steps to using the Split Toning tool in your photos:
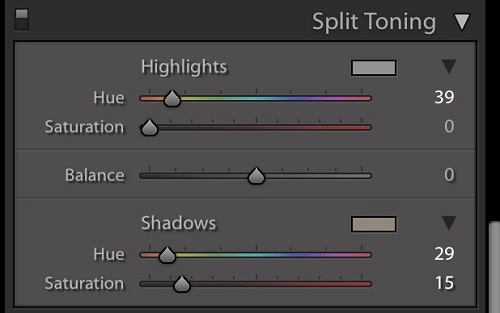
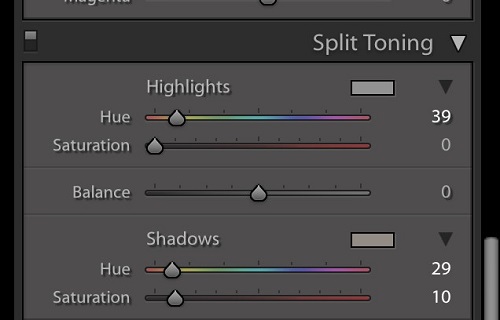
1. Start with the Shadows sliders. Move the Saturation slider to the right so you can see how the Hue slider will affect the tone of your photo.
2. Move the Hue slider until you’ve got the tone where you like it.
3. Readjust the Saturation slider until you get the amount of tone you like.
4. Repeat Steps 1-3 with the Highlights sliders if you’d like to see how they affect your photo. Pro tip: Just be careful with skin tones.
5. If using both the Highlights and the Shadows sliders, try adjusting the Balance slider. If you want more toning in the shadows than the highlights, move the Balance slider to the left. If you want more toning in the highlights than the shadows, move the Balance slider to the right.
Remember: It’s OK to experiment with all of the Split Toning sliders in Lightroom. You won’t permanently change anything in your photos, and you can always go back to the original. Have fun!