Have you ever stood in the middle of a giant redwood forest and looked up toward the sky to get a sense of the true height of the trees?
Chances are you might feel a sense of great awe and even a bit of vertigo due to their extreme perceived height.
If you point your camera upwards to capture this view, you will immediately note how the tree trunks form diagonal lines that converge at the point of open sky. These diagonal lines add depth and perspective to this scene, as well as making the scene more dramatic.

In photography, identifying diagonal lines can help you to enhance your images, if you know how to use those lines to their best advantage.
You can find these lines and shapes everywhere. In nature you find them in trees, mountains, crystals, and snowflakes. In the manmade world you find them wherever you see straight lines.
Diagonal lines and their associated shapes, triangles, by their nature are more dynamic than straight or horizontal lines that imply strength, serenity, and stability.
Incorporating diagonal lines in photography creates a sense of movement and help direct the eye to the subject. They also help to add depth and perspective.
Let’s see a few examples of how I have used diagonals and triangles to improve my images and make them more interesting.

I shot the above image in the city of Ponta Delgada in the Portuguese Azores last spring.
The locals were celebrating pre-Easter religious festivals and had decorated their neighborhood with festive banners and window displays. I found this interesting window ornament and was thinking of a more unusual way to show it in an image.
In looking at the scene, I noticed banners and lights, as well as the building’s setting in its neighborhood.
I composed this shot with a lower angle to exaggerate the keystone effect (where buildings appear to tilt backwards) of the architecture and also utilized the wires as a design element to lead the viewer’s eye back to the illuminated window ornament.
You will note how the top wire starts at the upper left corner of the image and aligns with the red roof tiles.
One trick I use is to have at least one diagonal line beginning from the corner of the image, preferably the left, to draw the viewer’s attention into the image. The main subject is itself shaped like a radiating star. The diagonal lines radiating from the center naturally calls attention to the subject. The rest of the image also features numerous triangles that create striking lines that add further interest.
Here is another example, but where I’ve used diagonals and triangles for a portrait.

This was made in Valparaiso where my local guide introduced me to his friend—let’s call him Gustavo.
Gustavo is standing in a building that was once the city prison and where he served a 13-year term for theft. The building is now a cultural arts center and he serves as a guide, often pointing out where his old cell once stood just above his head.
For this portrait, I utilized the diagonal line on the left to draw your eye into the scene. The triangle it forms with the other line and the row of lockers at the bottom help to frame Gustavo in the image.
In order to include Gustavo with the architecture, I had to shoot from his waist level and point the camera up. This extreme camera angle creates the keystone effect, which also affects people. To avoid distortion of his proportions, I had Gustavo intentionally lean forward slightly to counteract the effect and you see that he appears normal.
I mentioned that diagonals can be found in nature as well. Here is an example of where I used a natural diagonal line.
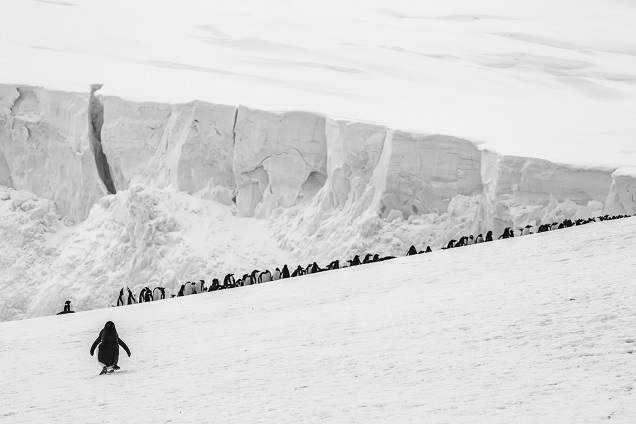
I took this image in Antarctica. I was drawn by the sharp diagonal line of the glacier and the opposing incline with the line of penguins. For additional interest I included this one bird that was making its way to join his friends in line.
Because it appears largest in the photo, and because of its location in the lower left section of the photo, your eye is drawn to the sole penguin first.
Your eye follows its direction toward the line. You follow the line to the right and then back to the left along the edge of the glacier. The triangle that is formed also has the most detail and contrast of the ice, further holding your gaze in the central portion of the image.
As you can see, diagonals and triangles add interest and visual motion in your image. They are not static and your eye will follow them around the image. You can use them to direct attention to your subjects or to frame them. You can also use them to move your eye around an image.
Here are a few more tips to keep in mind:
• Keep a look out for Z-shapes. Like an S-curve, a Z moves your eye from side to side but the movement is more jarring so the image takes on a more dynamic feel.
• Play with tipping your camera to create diagonals with straight lines and change your shooting positions to try low and high angles.
• Have diagonals cross at intersecting points of the thirds.
As you begin to use diagonals and triangles, you start to recognize them and see them everywhere. Have fun using this new technique and practice, practice, practice!