If you want to become a better photographer, one of the most important skills to learn is how to simplify.
Black and white photography is really all about simplifying. By removing colors from your scene, you actually remove a lot of potential distractions.
With color “out of the picture” so to speak, the image becomes much more about how you choose to compose the lines, shapes, and other elements within your frame.
Black and white works particularly well if you’re photographing a setting or event where there could be a lot of competing bright colors in your shot.
It also pairs really well with portrait, landscape, travel, wedding, architecture, and documentary photography to name just a few.
It’s important to know that photographing for black and white is not the same as photographing for color. Many black and white images can end up looking dull and lifeless.
So how do you create stunning black and white images? Here are a few tips to get you started:
Tip #1: Look for a wide range of tones.
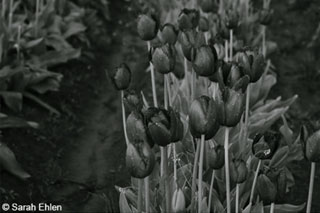
The best black and white shots usually include areas of bright white, deep black, and many shades of gray.
For example, the photo of tulips on the left is kind of drab with only a couple shades of gray, but the image on the right really pops with a wider range of tones.
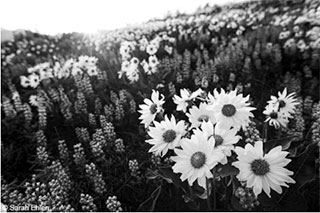
Tip #2: Keep an eye out for interesting lines, shapes, and patterns.
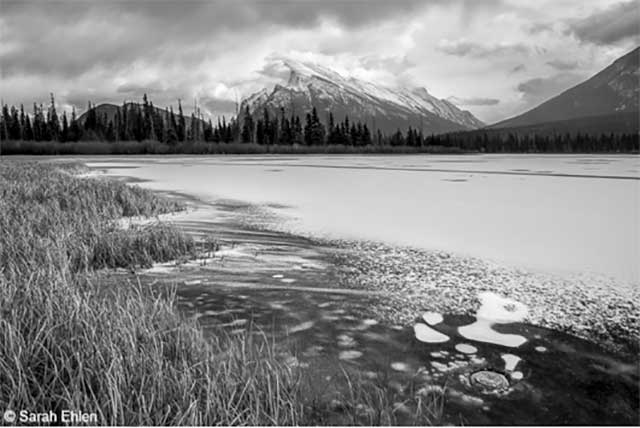
As mentioned before, these elements will really stand out with black and white, so you want to be sure to use them to direct the viewer’s eye and bring attention to your subject.
For example, I used a pattern in the ice to provide an interesting foreground for the mountain scene below.
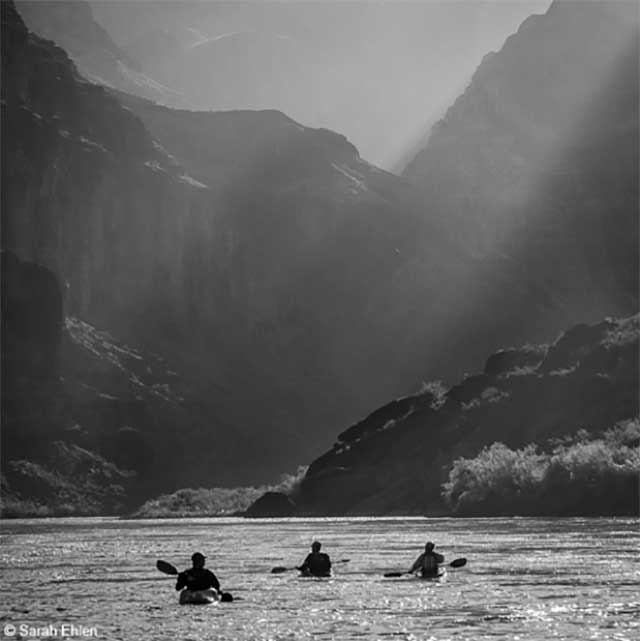
Tip #3: Be aware of high contrast scenes.
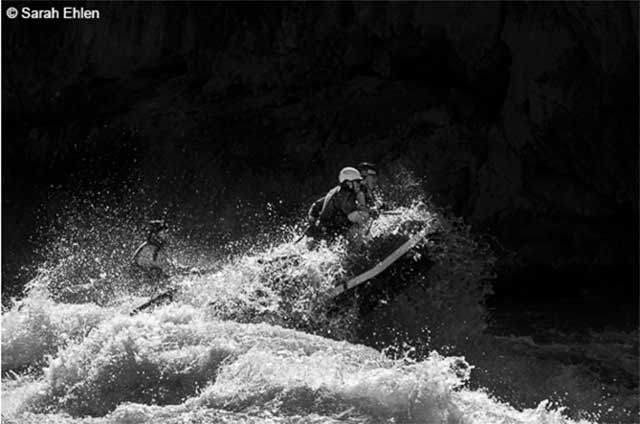
Whenever you’re faced with very bright and also very dark areas in the same scene, black and white can be a real lifesaver.
If I have to photograph in the middle of the day during harsh light, I often go with black and white because that usually looks great with high contrast conditions. This was certainly the case for both images shown below.
Tip #4: Pay attention to light and shadow.

You’ll want to avoid putting super bright areas on the edge of your frame because that could draw the viewer away from your subject and out of your shot.
Also watch where the light and shadows fall in your image.Oftentimes shadows create interesting outlines, shapes, and layers. Beams of light can sometimes be lined up with your subject. There are many ways to use light and shadows in your black and white compositions if you start observing closely.
It can take a while to learn to see in black and white and recognize which scenes or subjects will work best without color. The best advice is to experiment, give it some practice, and be patient with the learning process.
One thing that may be helpful is to tell your camera to shoot in monochrome. This will give you a black and white image straight out of your camera. Jump into your camera settings to find that option. It’s sometimes called “picture style,” “picture control,” or “creative style” in the menu.
The other option is to shoot in color and convert to black and white using editing software such as Adobe Lightroom. This will give you even more options in how your photo turns out, especially if you also photograph in a RAW file format.
If you learn the art of simplification through black and white, I promise you’ll become a stronger all-around photographer, and also create some striking images in the process!