When it comes to editing your photos, small changes can make a big difference.
It’s really just about knowing the little tricks you can do in Lightroom to quickly improve a photo.
Check out the image below:
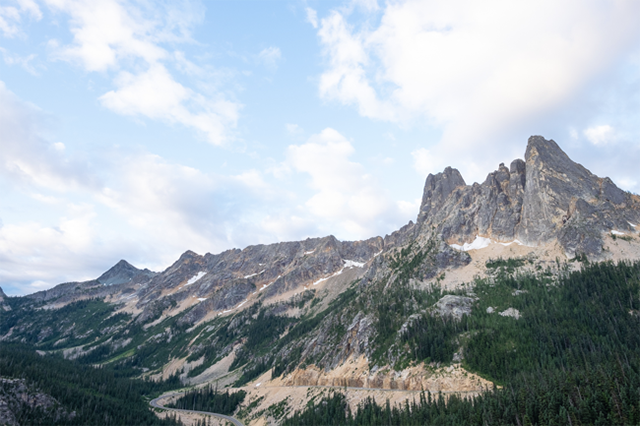
It’s all right, but the sky is a little “blah.”
With just a single slider in Lightroom, I was able to transform it to this:
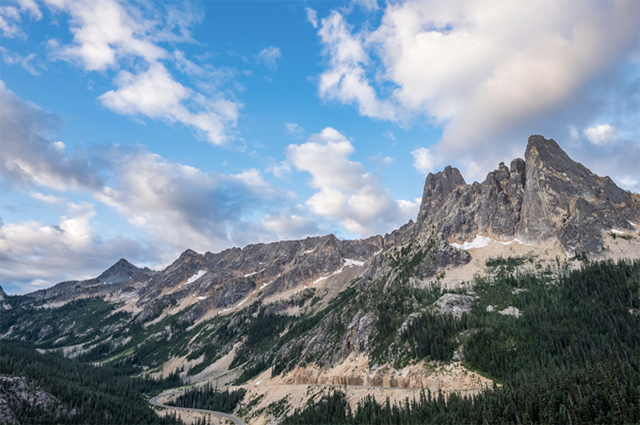
Here’s the secret…it’s the Blue Luminance Slider.
Follow these steps to give it a try on one of your own photos:
- Open the Develop Module.
- Expand the HSL panel. (HSL stands for Hue, Saturation, and Luminance.)
- Be sure to click on the Luminance tab to open the correct set of sliders. Here’s a screenshot:
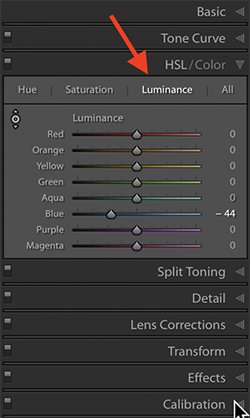
4. Then pull the blue slider to the left, which will darken your blue skies.
That’s all there is to it! This super simple trick can totally transform your landscape photos or really any photo with washed out skies.
Here are a couple of tips to keep in mind when using this tool:
Be sure not to overdo it. You don’t want your skies to look overly processed or fake. Only pull the slider the minimum amount you need to get the desired effect. (The exact amount you pull the slider will depend on the image and will vary greatly depending on your photo.)
Note that this adjustment is a global adjustment. This means it affects the entire photo. So, if you have other blue areas in an image, such as someone’s clothing, it will also darken those. You may or may not want this to happen, so it’s something to keep an eye on. This trick won’t work on every photo.
Although this technique works wonders for blue skies, you can really use it on any color for a variety of purposes. The best advice is to open a photo and experiment.
A word about the vocabulary… Luminance affects how light or how dark any given color is. For example, if you lighten a color you will create a pastel effect, and darkening will do the opposite.
Saturation affects the intensity of the color that’s selected, and Hue shifts the actual color itself. I rarely use the Hue tab because it creates such drastic changes, but Saturation can come in handy. For example, if you wanted to not only darken your blue sky, but also pop the intensity of that blue color, you could use a combination of the blue Luminance and Saturation sliders in the HSL panel.
Different combinations of sliders will give you different effects…the sky is really the limit! (Pun intended.)
Once you learn a few tricks like this, editing your images in Lightroom becomes fast and efficient. And your photos will never be the same. Have fun!