Adobe Lightroom can magically transform a drab image into a saleable photo that pops with just a few quick, simple edits. As I always shoot in raw, the difference between the original file and the final edit is like night and day. Raw images look dull, flat, and unimpressive—the magic happens during processing.
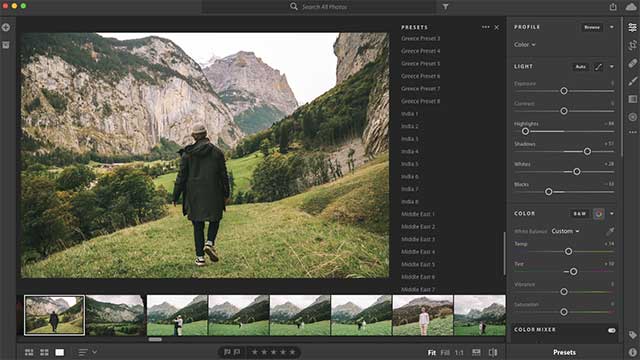
Making presets for repeated actions on multiple images is a huge timesaver.So, in the Develop module under the Presets panel, I created a preset with edits that I make to every image. After importing images into Lightroom, I select all the images I want to process and click on the preset to apply it instantly. By not automatically applying my preset on import, I can compare my final processed image with the original imported raw image in the History panel.
For this preset, under the Lens Correction panel I clicked on Profile and checked Remove Chromatic Aberration and Enable Profile Corrections. This automatically applies the lens profile specific to the lens used to shoot the image. I can make different presets for different lenses. Also, as I shoot a lot of landscapes and seascapes at the moment, under the Basic panel next to Profile I selected Camera Landscape.

After I’ve applied the preset, I make edits to individual images. I start by straightening the horizon if there is one. Then, in the Basic panel, I adjust sliders for Highlights, Shadows, Whites, Blacks, and Exposure while keeping an eye on the Histogram to avoid clipping the edges. I also often boost the clarity to increase the contrast of the gray tones in the image, but it depends on the effect I’m looking for.
In the Tone Curve panel, I make a slight “S” shape with the Parametric Curve for the Highlights, Shadows, Lights, and Darks, and I might also play around with the Red, Green, and Blue Channels.
After I finish my global edits, if there are some bright areas such as washed-out skies or a dark foreground, I use Graduated Filters to adjust exposure and bring back detail in the highlights and shadows. I also use the Radial Filter and Adjustment Brush to lighten or darken parts of the image to lead the eye to specific areas.
I then focus on the image color by playing with the drop-down menu of White Balance options or adjusting the Temperature and Tint sliders.
I might also open the Profile Browser by selecting Browse from the same drop-down menu or by clicking on the four squares to the right of Profile. Holding my cursor over each profile option allows me to see the different effects on my image. Sometimes I select a more artistic profile when I’m editing fine art photos. Having these options is one of the many benefits of shooting in raw.
In the HSL/Color panel I might play with the luminance for certain colors or reduce the saturation for a specific color that’s too prominent in the image.
Finally, I zoom in at 100% to check for sensor spots that I remove with the Spot Removal tool or other issues such as noise that I can reduce with the Noise Reduction sliders in the Detail panel.
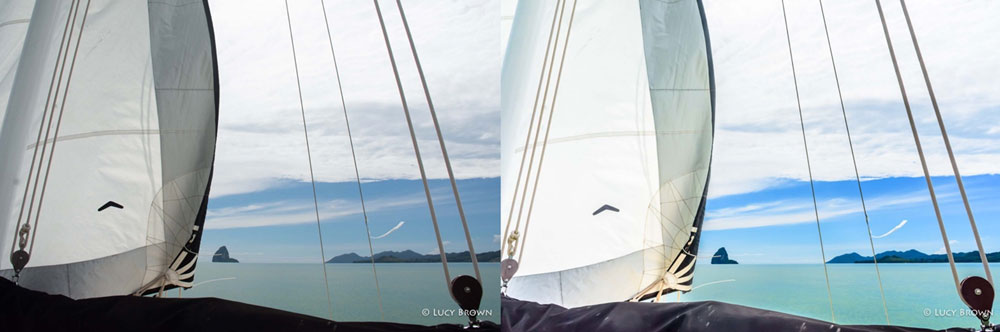
Here is an example of my original imported raw image alongside my final processed image:
Processing in Lightroom is a continuously evolving journey. As Lightroom enhances existing tools and introduces new ones, I pick up new editing tips, tricks, and techniques. I’m constantly learning and improving my processing skills.
One tip I picked up recently to create more impactful images is to utilize the sliders in the Calibration panel. So far, I’ve mostly experimented with the Blue Primary Saturation slider to add a gorgeous glow to my landscapes and seascapes, but I will be exploring it further!
If I could only use one panel in the Develop module in Lightroom it would be the powerful Tone Curve. It provides the tools to create dynamic, stylized images and it’s great fun to experiment and discover its full potential.
When I process a photo, just straightening a crooked horizon, cleaning up sensor spots, and quick adjustments to the exposure, highlights, shadows, tone curve, and white balance make a huge difference.
Just like with any art form, photo editing aesthetics depend on individual tastes and there’s no right or wrong way. I’m sure another photographer would edit my photos in a totally different style! I see my imported raw image as the half-finished canvas and Lightroom as the brush, palette, and magic at my fingertips to create my own unique vision.